Welcome! We want you to be successful. The fastest path to success is to set up and optimize your Dashboard following the steps here, in order. You'll see that many items are optional or don't require you to do anything - we just want you to be familiar with them.
If you're a new user, remember that you can’t log in to your Dashboard until we’ve set it up for you and sent you an email letting you know that your account has been created. When you receive that email, click the link and enter the password of your choice to log in to your Dashboard. Then follow these steps to get up and running.
The Dashboard
Your Dashboard is where you manage everything in your account other than billing, adding new users, and adding new business locations (see "Account Information & Details" section below for how to manage these items).
If you only have one business location in your account, you’ll be taken to the Dashboard for that business as soon as you log in.
If you have more than one business in your account, you can choose which business you’d like to manage using the search bar at the top of the screen.
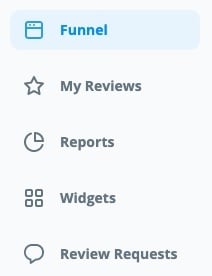
The navigation menu is located on the upper left. Click any of the links to view that page of the Dashboard.
Funnel
This is where you setup your business profile and customize the review funnel that all of your customers will see.
Funnel > Links
In your Dashboard > Funnel on the left side under Links > Business Location Info, click the “Connect a Location” button.
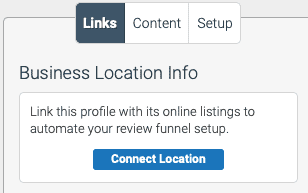
Follow the instructions in the popup window to find your business and auto-load your Review Site Listings. Confirm the listings shown (check the correct ones and uncheck the incorrect ones) and then click the “Continue” button at the bottom of the window to load this profile.
If Your Business Was Found
If your business was found then you’ll see its information in your Business Location Info on the left side of the screen.
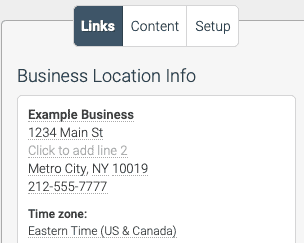
Your Review Site Listings appear below your business. You can reorder, delete, edit or add a new site listing here.
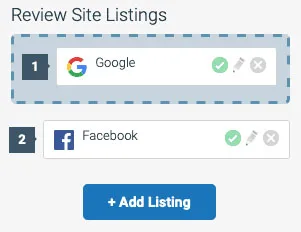
IMPORTANT: Yelp is the only site that does not have a checkmark next to it to make it visible. The reason is because Yelp’s Content Guidelines discourage you from directly asking your customers for Yelp reviews.
A workaround for this is A) adding your Yelp review link here in order to track your Yelp reviews, and then B) adding a Custom Link with the Yelp logo and your Yelp listing URL in order to make your Yelp link visible in your Funnel along with your other review site links. To add a custom link, click the "+ Add Listing" button, scroll to the very bottom of the list and select "Custom Link".
Please note that it is up to you to decide whether or not you want to go against Yelp’s Content Guidelines. If you use Yelp’s site or apps, you may be bound by their terms of use. And by using our site and service, you have already agreed that you are solely responsible for complying with any such third-party contracts. Many of our clients choose to use the above workaround in order to display the Yelp Review Link, however the decision is entirely yours.
If Your Business Was NOT Found
If your business was not found on online review sites, a popup window will appear informing you of this. Click the “Continue” button in that window and after a moment the information you entered into the original “Connect a Location” window will appear in your Review Profile. All of these fields are editable. Be sure to fill them out as completely as possible.
If your business was not found, or if you want to add any additional review site links, just click the “Add Listing” button at the bottom of the “Review Site Listings” section.
Review Monitoring URLs
IMPORTANT: Some review sites show your reviews on a page other than your main profile page. These sites include: Amazon, Avvo, BBB, Cars.com, Edmunds, Facebook, Google+, Houzz, Indeed, RepairPal, Trulia, Vitals, WeddingWire, Wellness, Zillow and others.
To ensure that Review Monitoring (covered below in "Reviews") will work on these sites, first go to your profile page on the review site (Facebook, Amazon, etc.) and find and copy the URL of your review page. Next, go to Dashboard > Funnel > Links > Review Site Listings. Click the pencil icon on the site link you’d like to modify.

Paste the monitoring URL in the box labeled “Review Monitoring URL (optional)”.
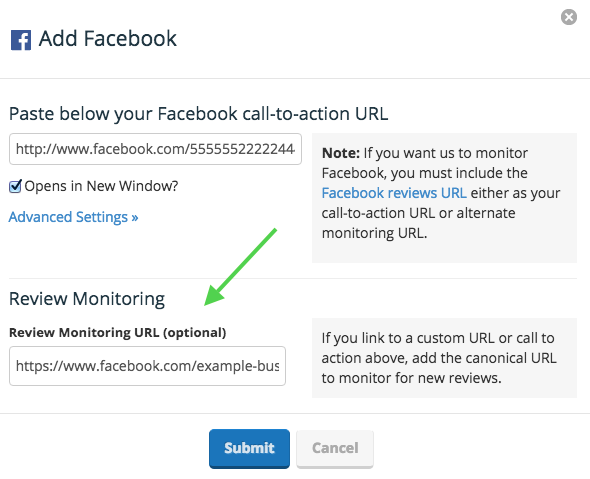
Click the “Submit” button to save your changes.
Notifications
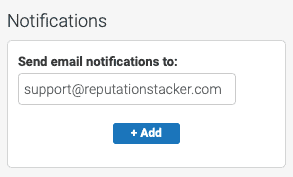
In the Notifications section, make sure that the email address is the one that you want notifications sent to, and feel free to add any additional email addresses here as well.
Social Links
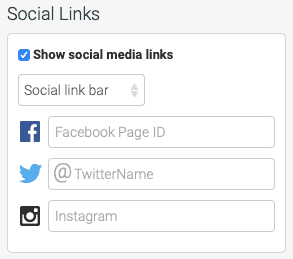
In the Social Links section, if you’d like to encourage your customers to connect with your social media accounts then enter your page ID or handle (not the full URL) to those accounts here.
Funnel > Content
In your Dashboard > Funnel on the left side near the top, click the Content tab.

Here you can customize the settings of the funnel's appearance.
IMPORTANT: The United States Federal Trade Commission ("FTC") occasionally issues new guidelines regarding online reviews. The current set of guidelines states that you must treat all customers the same when asking for reviews, meaning that you should offer customers who may review you negatively the same opportunity to review you as you offer customers who may review you positively. If you have concerns about this then you can ask all of your customers to post a review (regardless of their funnel rating) by scrolling down to "Interaction Design" and setting the "Threshold" to "All to Review".
Funnel > Setup
In your Dashboard > Funnel on the left side near the top, click the Setup tab.

You aren't required to change anything here if you don't want to - your Review Funnel will work just fine with the default settings.
However we highly recommend that you add your logo as it will make your Review Funnel look professional.

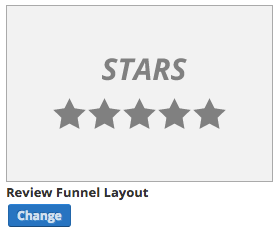
You can also change your Review Funnel Layout if you'd like. Click the “Change” button to see your options.
My Reviews
If your plan includes Review Monitoring & Streaming, this is where your reviews will appear. If your plan does not include Review Monitoring and you'd like to add it, you can upgrade your plan (let us know here).
My Reviews > All Reviews
The All Reviews tab shows your reviews as your customers post them.

In the “Status” column you can click the “Share” button to post a review to your Facebook or Twitter account (info on where to set these links up below). You can click on the “Respond” button to be taken to the review site and publicly respond to the review. Note that you will need to login to the review site with your business owner account in order to respond publicly.
In the "Status" column you can also click the "SET STATUS" text (directly under the "Respond" button) in order to log an internal note about the review.

In the "Stream" column you can click the checkbox on or off to show or hide any review in your Review Stream widget. You can also click the pencil icon to edit a review.
IMPORTANT: It is a violation of our Terms of Service to alter any user content, review, or testimonial beyond basic spelling or grammatical corrections.
Click the “+ Add a Review Manually” button on the right to add a customer’s testimonial to the stream.
Click the “Upload CSV” button on the right to manually add multiple customer testimonials at one time.
My Reviews > Customer Feedback
The Customer Feedback tab displays any direct written feedback your customers have submitted via your landing page.
My Reviews > Review Stream

The Review Stream embed code allows you to show the reviews of your choice on your own website.
It is available to you only if your plan includes Review Monitoring & Streaming. If your plan doesn’t include Review Monitoring and you’d like to add it, you can upgrade your plan (let us know here).
IMPORTANT: The United States Federal Trade Commission ("FTC") occasionally issues new guidelines regarding online reviews. The current set of guidelines states that you must publish all genuine reviews and don’t exclude negative ones. If you have concerns about which reviews you should display on your website using the Review Stream, click the 'Settings' tab, and in the 'Stream Defaults' section you can change the auto-publish setting to "any star rating" to show all of your reviews. Be sure to click the “Save Stream Settings” button to update your changes.
To display your Review Stream on your own website, copy the “Embed Code” and paste it anywhere within the <body> html on any page on your website.
My Reviews > Settings

Review Alerts
In this section you can update and add email addresses that review notifications should be sent to.
You can also adjust alert settings to only send you alerts for reviews below a certain start rating, or to not send you alerts at all.
Be sure to click the “Save Alert Settings” button to update your changes.
Stream Defaults
Here you can adjust the automated settings for which reviews appear in your Review Stream.
IMPORTANT: The United States Federal Trade Commission ("FTC") occasionally issues new guidelines regarding online reviews. The current set of guidelines states that you must publish all genuine reviews and don’t exclude negative ones. If you have concerns about which reviews you should display on your website using the Review Stream, change the auto-publish setting to "any star rating" to show all of your reviews.
Be sure to click the “Save Stream Settings” button to update your changes.
To display your Review Stream on your own website, copy the “Review Stream Embed Code” from the "Review Stream" tab and paste it anywhere within the <body> html on any page on your website.
Social Media
In this section you can add your Facebook account to make it easy to share your reviews with your fans and followers.
In the “Review Stream Auto-Sharing” section you can even automate new review sharing on Facebook. Be sure to click the “Save Social Settings” button to update your changes.
Reports
If your plan includes Review Monitoring, you can generate and automate comprehensive reports in this section.
If your plan does not include Review Monitoring and you'd like to add it so that you can access the Reports feature, you can upgrade your plan (let us know here).
Generate A Report
Your key analytics will display for the past three months in Reports > Analytics. To create an on-demand report, click Reports > Generated Reports, then click the "New Generated Report" button in the upper right, choose the display settings you desire in the popup window, then click the “Create Report” button. It may take anywhere from a few seconds to a few minutes for the system to generate your report, all depending on how much information needs to be found and imported into our reporting engine.
Once you've created a report it will appear in your reports list. Under the "Links" column you can click the browser icon to view the report in a browser window, or click the document icon to download a PDF of the report.
Schedule A Report
To schedule a report to run automatically, click Reports > Scheduled Reports, then click the "New Scheduled Report" button in the upper right.
This will open the scheduled report's settings, where you can customize the settings for this report, including how often the report will be run, the timeframe that the report will cover, who will receive the report via email, and the content of the email in which the report is sent. Be sure to click the “Update Settings” button on the lower left to save your changes.
Widgets
This is where you can access a variety of tools to help you get more customer reviews.
If your plan doesn’t include Widgets and you’d like to add them, you can upgrade your plan (let us know here).
Widgets > Digital > Landing Page Widget
Your review funnel lives on our servers, but to display the landing page widget on your own website, copy the “Embed code” and paste it into the <body> html on any page on your website.
Remember that you can edit how this page looks in the Funnel section of your Dashboard.
Widgets > Digital > Email Signature Snippet
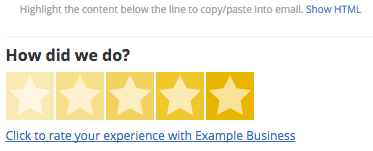
Highlight then copy and paste this content into your email signature to create a mini-review-funnel lead with every email you send.
Widgets > Digital > QR Code
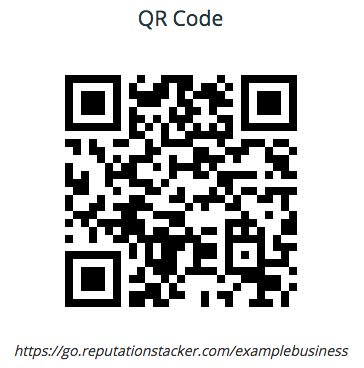
This QR code links directly to your Review Funnel. You can save this image (control+click on PC, command+click on Mac to open save settings) and add it to any marketing piece.
Widgets > Digital > "Review us" Button
When clicked, this button will open up a window that contains your Review Funnel. Click the button on your Widgets page to see how it will look.
To display this button on your own website, copy the “Embed code” and paste it anywhere within the <body> html on any page on your website.
You can edit the color of this button in the Funnel section of your Dashboard (Funnel > Setup > Brand Color).
Widgets > Print
Printable Review Requests
This allows you to create printable assets (a business card for example) with your QR code and funnel landing page URL.
Widgets > Client & Staff Forms
Review Requests Form
This is a password-protected form that allows your staff to create email and SMS text invites.
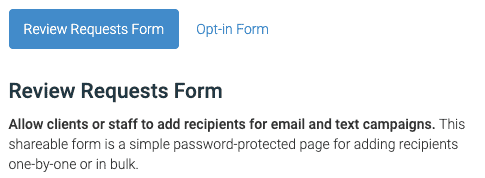
Simply copy the URL that is shown above the form in blue, send it to your staff, and have them open it in any web browser. They can create invites directly from this form without having access to the rest of your account.
IMPORTANT: On the left side of this page you will see a number of settings sections:
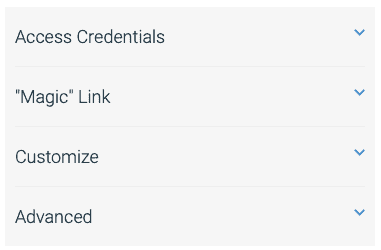
"Access Credentials" allows you to customize a Username and Password to protect the form so that only those who have the credentials can access it.
""Magic" Link" is a URL that you can give your staff so they can access the form without having to use the Access Credentials.
"Customize" allows you to change the text that appears on the form.
"Advanced" allows you to add a custom field to the form.
Opt-in Form
For businesses that don't already collect their customer's email addresses or phone numbers, this form allows your customers to opt themselves in. It works best if you ask customers if you can send them a short feedback survey first, then have them enter their email address into the Opt-In form, which you can have loaded on a phone, tablet or computer.
Review Requests
This is where you manage the review invitations that you send to your customers.
All plans include email invites. SMS text invites (phone text messages) are optional depending on the plan you signed up for. If you don’t see this option in your Invites Dashboard, you can let us know here.
Review Requests > Recipients
Individual Invites
To create an individual invite for a customer, click Review Requests > Recipients, then click the “Request Review” button on the right and follow the instructions in the popup window.
When you click the “Request Review” button in the popup window, the invite will be queued up in the “In-Queue” tab, ready for you to “Activate” and send it.
Bulk Invites
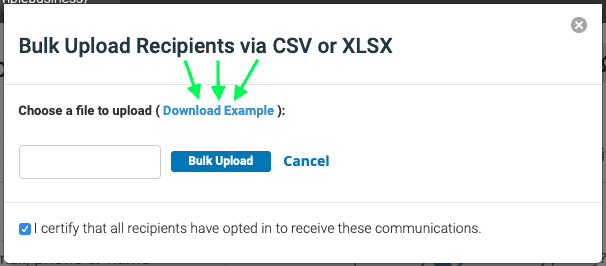
To create bulk invites for a list of customers, click the “Bulk Upload” button on the right and follow the instructions in the popup window. Click the "Download Example" link to download the CSV template.
When you click the “upload” button in the popup window, the invites will be queued up in the “In-Queue” tab, ready for you to “Activate” and send them.
IMPORTANT: When you upload a bulk customer list, if both an email address and phone number are provided for a given customer, they will receive emails and SMS text messages. This counts towards your total SMS text message allotment for the month, so if you want to conserve you text message usage then you can leave the phone number off any entries that you only want to receive emails, or you can remove one or two of the SMS text message templates by clicking the "Delete" button next to the template name in Review Requests > SMS Settings > Campaign.
Also note that once your text message allotment is completely used for the month, any entries that contain both email & phone number won't be sent out until the month cycle is complete and a new month cycle has begun. If this occurs (and/or to prevent it), you can remove your entries containing both email & phone number and upload entries that contain email only, or you can upgrade to a plan that includes more SMS messages (let us know here).
The Recipient List
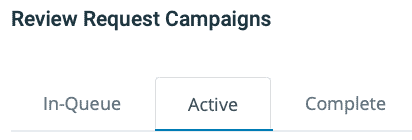
The Recipient list shows which of your invitations are "In-Queue", "Active" or "Complete".
In-Queue Tab: Customers in the “In-Queue” tab have not been sent a review invitation yet. You may choose to turn on or off “Auto-activate recipients daily” (it's turned "on" by default).
When you set this to “on”, our system will automatically send invites to your customers without you having to do it manually. Most users prefer this, but you can set it to “No” if you’d like more control over activations.
You may also click the “Activate All” button at the top to activate the entire group, or click "Activate" on individual entries to activate the invitations manually. You may need to refresh your browser window to see these options.
Active Tab: Customers in the “Active” tab are in the process of receiving emails and/or SMS text messages in the drip campaign.
You can click the "End Campaign" button to stop sending them review requests (if for example you know they’ve written a review already).
Customers in the “Complete” tab have already been sent all emails and/or SMS text messages.
Email/SMS Activity Tab: Use the “Email/SMS Activity” tab to see what actions your recipients have taken with your review requests, including whether they've opened, clicked, or unsubscribed.
Funnel Activity Tab: This shows what actions (if any) a recipient has taken on your funnel, for example clicking 5-stars and then clicking your Google link. Note that just because a recipient clicked a review site link on your funnel, that doesn't necessarily mean that they posted a review on that site. They still must submit a review on the selected review site in order for the review to appear on that site. If the site is trackable and in your Review Site Listings in your Funnel tab, the review will appear on the My Reviews tab within 24 hours.
Review Requests > Email Settings
Here you can edit the contents of your email review invitations and send yourself a test to see how they look. You do not need to make any changes at all - in fact most users stick with the default templates and make no changes.
The system is set to send out three emails over the course of a week to maximize the likelihood of your customers giving you reviews. Click on the different titles of the emails in the “Email Drip Campaign” column if you want to edit any of the email templates.
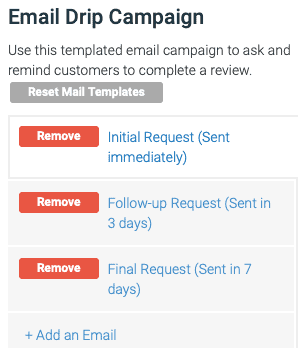
You can edit the body content of these emails, and also edit when they are sent, as well as the subject.
DO NOT CHANGE PLACEHOLDERS (unless you really know what you're doing)! Placeholders (such as [[first_name]]) are for dynamic data insertion. Changing these can cause confusion for your recipients and link/data issues.
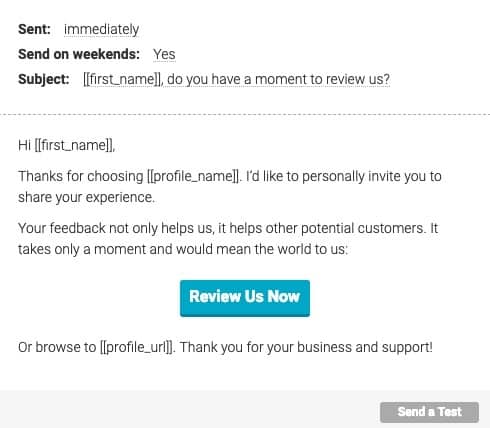
Click the “Send a Test” button at the lower right of any email template to send yourself a test email.
On the right side of this screen you can make adjustments to your "From name", "From email" and "Reply-to" email.
IMPORTANT: Using a custom email address ("[email protected]") in the "From email" field may cause deliverability issues. Usually this is not the case, however to ensure maximum deliverability, leave this field blank. If your email address is from a free email service (such as Google, Yahoo, Hotmail, etc), leave the "From email" field blank no matter what. Otherwise your emails will bounce (i.e.: they will not be delivered to recipients).
Review Requests > SMS Settings
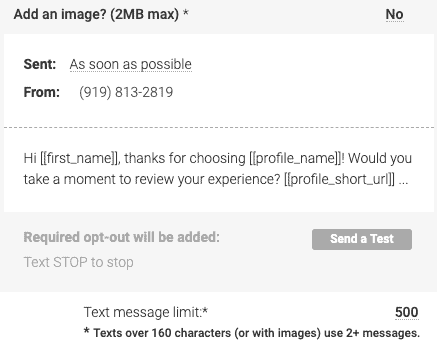
On this tab you can edit the contents of your SMS text review invitations and send yourself a test to see how they will look. You do not need to make any changes at all - in fact most users stick with the default templates and make no changes.
DO NOT CHANGE PLACEHOLDERS (unless you really know what you're doing)! Placeholders (such as [[first_name]] and [[profile_url]]) are for dynamic data insertion. Changing these can cause confusion for your recipients and link/data issues.
In the "Inbox" tab, you can see any replies to your SMS text messages. It's rare that customer replies to the message directly, but if they do you can click the "Details" button to see the entire conversion. In the "Details" popup you can also reply to the recipient. Note that replies sent from the "Details" popup will count toward your monthly SMS text message usage.

In the "Configure" tab, you are able to set up autoreplies for customers who respond to your text message campaigns (again this is rare but it does happen on occasion). By default, recipients who reply to campaign texts will receive the following message:

You can edit the existing autoreply or adjust the settings in the top right corner of the screen. You'll see the following options:
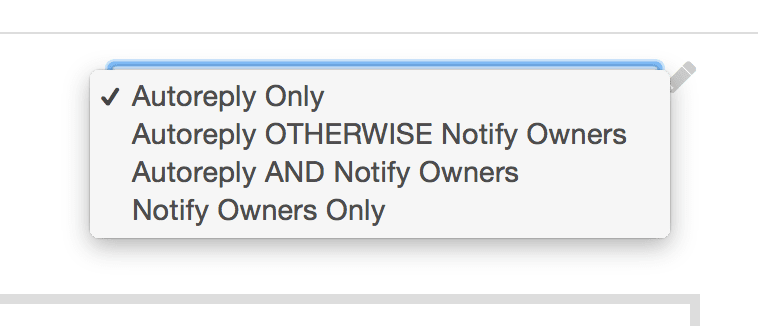
- Autoreply only (default): This is the default setting. When a reply is received, the autoreply will be sent to the recipient and their reply logged in the Inbox. No further action will be taken.
- Autoreply OTHERWISE Notify Owners: This option is the same as Autoreply AND Notify Owners, except it will only send notifications out when you receive follow-up messages beyond the first, auto-replied one.
- Autoreply AND Notify Owners: This setting will do everything that Autoreply only does, and will also send out an email notification to all users associated with the business profile. This will apply to every message sent.
- Notify Owners only: This option will never send out autoreplies but will instead notify associated users that a message has been received.
IMPORTANT: When you upload a bulk customer list, if both an email address and phone number are provided for a given customer, they will receive emails and SMS text messages. This counts towards your total SMS text message allotment for the month, so if you want to conserve you text message usage then you can leave the phone number off any entries that you only want to receive emails, or you can remove one or two of the SMS text message templates by clicking the "Delete" button next to the template name in Review Requests > Phone/Text > Campaign.
Also note that once your text message allotment is completely used for the month, any entries that contain both email & phone number won't be sent out until the month cycle is complete and a new month cycle has begun. If this occurs (and/or to prevent it), you can remove your entries containing both email & phone number and upload entries that contain email only, or you can upgrade to a plan that includes more SMS messages (let us know here).
How To Get Even More Reviews
Consistently sending your customers Review Requests and using the Widgets are the easiest ways to rack up reviews.
But you can follow these steps to maximize your account and get the absolute largest volume of quality reviews.
Kiosk Mode
If you don't already collect your customer's email addresses or phone numbers and you don't plan to start collecting them then either the Opt-In form (mentioned above in the Review Requests section) or Kiosk Mode is for you.
Kiosk Mode allows you to get feedback from your customers on-site, but they don't post a review until later. This is great for businesses that interact with customers in person, whether in a physical place of business or on the go.
After a customer enters their feedback, ReputationStacker sends them the follow up email or text later so that they write a positive review off-site and reviews don't come from the same IP address. Don't worry if you don't understand this - just know that it's best if customers don't review you while they are physically in your location.
Kiosk mode works from any smartphone, tablet, or computer, so even when you're on-the-go you can get customer feedback and reviews. Here's how how to use it:
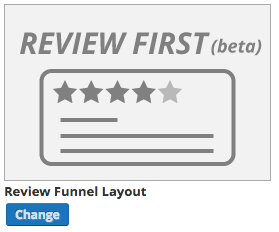
1) Set your landing page to the "Review First". To do this, go to Dashboard > Funnel > Setup, and scroll down until you see the Review Funnel Layout section:
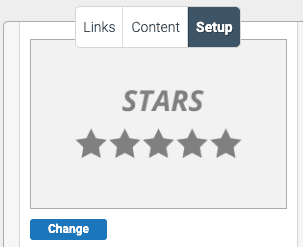
Click the "Change" button and in the popup window scroll down and click the "Review First" option.
2) Now scroll up and click the "Content" tab at the top of the page.

Scroll to the "Public Review Workflow" section and below the "Further instructions" box check the box for "Send as an email? (Kiosk mode)".
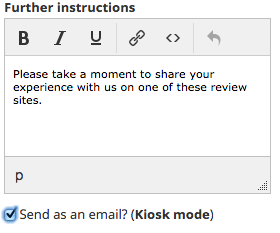
3) Copy your landing page URL (at the top right of your screen).

Paste it into the web browser address bar on your tablet, smartphone, or computer. Then save it as a "home screen icon" or "bookmark" so you always have easy access to it.
Now all you have to do is click your saved home screen icon or bookmark and the feedback form will show for your customers. Kiosk Mode resets itself every time a customer submits their feedback, so you don't have to worry about reloading it or protecting the previous customer's privacy.
With Kiosk Mode in place, happy customers will receive a follow-up email inviting them to post their review on one of your review site links (unhappy customers will not receive a follow-up email).
How To Get The Most Reviews Using Kiosk Mode
To get the most feedback and reviews, ask every customer for feedback. Before a customer leaves, just ask them if they would mind taking a two question survey and then hand them the tablet, phone, or computer before they can say no. When they see how easy it is, the vast majority of customers are happy to do it.
If you work on the go (examples: handymen, tutors, plumbers, movers) or if customer interactions occur away from a central counter (example: restaurant servers, personal trainers), you can use Kiosk Mode on your smartphone. Alternatively you may want to use a small dedicated tablet as this often appears more professional.
If your customers pay at a central counter (examples: medical offices, casual restaurants, retail stores), you will want to set up a dedicated tablet at or near the counter. It takes just a few minutes to permanently install a secure tablet stand, and taking this easy step shows your customers that you are serious about their experience and feedback.
Put Your Widgets to Work
Widgets are covered in detail above in the Dashboard > Widgets section, but if you want to generate the most positive reviews, you need to use them!
Businesses that use all (or even most) of the Widgets have a strong advantage over businesses that don't use them.
If you're intimidated by a little bit of code, don't let that get in your way! For less than the cost of a sandwich (and faster than it takes to make a one), you can find someone on UpWork or Freelancer to install the widgets on your website.
Testing and Optimizing Your Review Review Requests Settings
With a little bit of very simple testing, you can greatly increase the rate at which you get reviews.
You need a plan that includes Review Monitoring in order to run these tests. If your plan doesn't include Review Monitoring and you'd like to add it, you can let us know here.
All of the tests below follow the same protocol:
1) Choose a number of customers (example: 50 or 100).
2) Send that group of customers all the same email or text Invite.
3) Wait a week to give them time to review you.
4) Go to the Reporting tab and select the date period from the past week, then click the "Set dates" button. In the "Review Activity" section you can see how many reviews you received that week.
5) Make a change (per one of the tests below) and repeat steps 1-4. At the end of the week compare the number of reviews you received that week to the week before.
You can repeat these tests until you find the best combinations that get you the most reviews.
It's important that you only make one change at a time, otherwise you won't be able to isolate what is or isn't working. It's also important that you keep a record of each change that you make - it's hard to keep track of without keeping a record.
Email Customization Tests
Test a variety of variables in your email Review Requests:
• Send frequency: Immediately, next day, 3 days?
• Volume: Is one email enough? Is 3 too much?
• Send time: Better response in the morning, afternoon, night?
• From name: Your business name? Your name?
• Subject line: What words get a better response? "Review"? "Feedback"? "Feedback"?
• Body: What language in the text and on the button gets the best response?
The same body text test can be done for SMS text messages as well.
Review Funnel Layout
Sometimes the Review Funnel layout that you think looks the best for your business isn't the layout that will get you the most positive reviews.
To try out different layouts go to Dashboard > Funnel > Setup > Branding and Design > Review Funnel Layout.

Click the "Change" button and in the popup window choose a new Review Funnel.
Your Mix of Review Sites
Some review sites have a very selective filter of whose reviews show up and whose do not. Even customers with an established Google+ or Yelp account often have their reviews hidden from public view through no fault of their own.
If your industry has specialized review sites (examples: TripAdvisor, HealthGrades, Avvo, Angie's List, etc), realize that a lot of your customers don't have accounts on those sites and as much as they love you they are not likely to create them just to leave you a review.
For this reason we highly recommend including at least one non-industry-specific site when setting up your review site links. Facebook shines here because almost everyone already has a Facebook account, and Facebook is the second most popular place for people to leave reviews (behind Google, ahead of Yelp).
Volume and Frequency of Review Requests
Auto-activate In-Queue Recipients
We have found that most businesses get the best results by auto-activating their In-Queue Recipients and setting the number of Review Requests that are activated each day to the closest to your daily average of customers that you import into the system. If you're more hands-on, then "manual" mode may be for you. Details below.
You can choose to control when Review Requests get activated ("manual" mode) or you can let ReputationStacker automatically activate them for you ("auto-activate" mode).
To set this, go into your Dashboard > Review Requests > Recipients > In-Queue Recipients and next to "Auto-activate recipients daily?" make sure the slider is on the right side/on position.
Review sites often filter reviews out as "spam" if too many reviews for a business are posted in a single day, so ReputationStacker allows you to control how many invites get activated in a single day. The default is 10, but you change this to whatever you'd like. We recommend setting it to the average number of contacts that you import daily.
Customer Privacy and Security
ReputationStacker is dedicated to protecting your and your customers' information. Our system is extremely secure and private.
Privacy & Security
Hosted and Delivered Over HTTPS
Hyper Text Transfer Protocol Secure (HTTPS) provides authentication of the website and associated web server that a user communicates with. HTTPS also provides two-way encryption of communications between a client and server, which helps protects against eavesdropping and tampering with and/or forging the contents of the communication.
In practice this provides a reasonable guarantee that a user is communicating with precisely the website that she or he intended to communicate with (as opposed to an imposter), as well as ensuring that the contents of communications between the user and site cannot be read or forged by any third party.
Data Encryption
We take the safety and security of your personal information extremely seriously. When you enter sensitive information (for example, login credentials or payment information) we encrypt the transmission of this information using Secure Socket Layer (SSL) technology. HTTPS works with SSL to transport your data safely. SSL uses an encryption algorithm to disguise the data and ensure the security of your information.
Data Center Storage
All data within your ReputationStacker account is stored in secure data centers that utilize electronic surveillance and multi-factor access control systems. Access is authorized strictly on a "least privileged" (need to know) basis.
ReputationStacker Will Never Sell or Share Your Data
ReputationStacker doesn't sell or share your or your customers' information with anyone. Ever.
HIPAA Compliance
Users with Professional plans enjoy HIPAA compliant 256-bit SSL encryption for all communications. We take all the necessary measures to ensure appropriate protection of Protected Health Information (PHI).
All applicable Professional plan users are also covered under our Business Associate Agreement (BAA).
Account Information & Details
Your Billing Account is where you can make changes to your plan, manage payment, and download invoices.
Updating or Changing Billing Information
Updating your billing information is easy. Simply log in to your billing account, select the "Subscriptions" tab (on the lower left), click the "Update" link (on the right), then enter your updated credit card information on the following screen. Be sure to click the "Update Credit Card" button to save your information.
Upgrading Your Plan
If you have a single location plan and want to add features to it, you can upgrade your plan by letting us know here. We'll send you instructions on how to upgrade (it takes just a minute or two)
If you need to upgrade a multi-location plan to a plan with different features, you can also contact us.
Changing Your Passwords
In order to provide increased security, ReputationStacker separates your billing account from your Dashboard. Your billing account is where your billing information is kept and where you can update it. Your Dashboard is where you do all the things that ReputationStacker was built for.
Your billing account and Dashboard each have a separate password. You can change these passwords at any time, but note that for security purposes if you change your password in one it will not automatically change in the other.
Changing Your Billing Account Password
Log in to your billing account and click the "Change Password" link at the bottom of the page. You will be prompted to enter and confirm a new password of your choice.
Changing Your Dashboard Password
Log in to your Dashboard. From the "My Account" menu select "Change Password". Here you can enter and confirm a new password of your choice.
Canceling Your Account
Before you cancel your account, let us know! We are happy to help you in any way we can. A lot of times a couple small tweaks to your settings can fix any issues you're having. However if you still decide to cancel, you can follow these instructions:
First, log in to your billing account, select the "Subscriptions" tab, click the "Cancel" link (on the right), then click the "Yes" button in the pop-up window to confirm the cancellation.
When you cancel your account you will no longer be charged, however all of the information in your Dashboard will be automatically deleted.
There are no pro-rated refunds for days you have already paid for but not used, so it is in your best interest to wait until the day before your next scheduled billing date to cancel. To check when your next billing date is, login to your billing account and click the "Subscriptions" tab. Your next billing date is shown in the "Subscription" column.


